Everybody needs beauty as well as bread, places to play in and pray in, where nature may heal and give strength to body and soul alike. -John Muir

Saturday, March 26, 2011

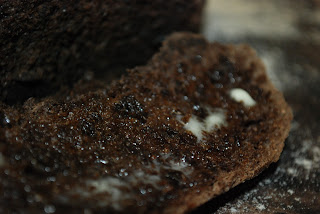
Black Beer Bread

I have been meaning to make this bread for a while.  The only problem was finding the right beer, which was a huge challenge for me because I do not drink beer.   The fact of which makes me the black sheep of my family.  I really wanted to use a local beer, but I finally decided the flavor profile of New Belgium's 1554  Enlightened Black Ale was what I really wanted.


Before I delve further into the recipe I want to take some time to describe why the beer choice was so important to this bread:  Quality of ingredients is everything. 

I wanted a bread that is rich, soft, dense, with notes of coffee and chocolate.  But I also wanted to balance that with the slightly bitter taste of hops to balance out the sweet complexity of the malt and the molasses.


What you will need:
12 oz bottle of a dark beer
1/3 cup molasses (dark)
1 1/2 tsp instant coffee (I used expresso)
2 tbsp dry milk powder
2 cup bread flour
1 cup whole wheat flour
1 cup rye flour
3 tbsp unsweetened cocoa powder
1 tsp salt
2 tbsp (soft) butter
2 tsp yeast (bread machine)


Place the ingredients into bread maker in the order they are listed.  Put the bread maker on dough cycle.  When the dough cycle has ended, knead the dough and shape it in a ball.  Allow to rise for 40 min.  Preheat the oven to 350.  Bake bread for 35 minutes or until it sounds hollow when tapped.


When it is done, take it out of the oven to cool  enjoy immediately, slathered in butter.  Yum!

Sunday, March 13, 2011

Roasted Brussel Sprouts

Undoubtedly, we all have heard of the terrible stigma associated with brussel sprouts.  This is unfortunate because they are quite delicious.  I wanted to mix up the cabbage and potatoes for St. Patrick's Day this year, so I roasted some of these... I consider it a wise decision. Yum!


What you will need:
1 lb brussel sprouts
2 tbsp olive oil
1 tsp sea salt
freshly ground pepper (to taste)


Preheat the oven to 400.
Prepare the brussel sprouts by cutting off the brown ends, peeling off the outer leaves if needed and slicing them in half.
Add the brussel spouts, oil and salt to a bowl.  Toss until the brussel spouts are coated.   Place the brussel sprouts on a baking sheet and dust with pepper.
Cook for 35 minutes, stiring half way so they cook evenly.


It's that easy. And very good.

Saturday, March 12, 2011

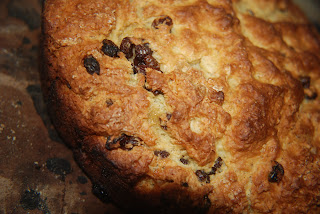
Irish Soda Bread (Spotted Dick)

Those of you who do not know me well, or at all, may not know that I love St. Patrick's Day more than Christmas, New Years and Halloween  all put together.  I can't exactly tell you why.  My mom used to make us green clover shaped pancakes and boiled cabbage and potatoes for us  and corn beef hash for my father.  Although I am not quite willing to boil cabbage and potatoes, every year I always end up making at least 2 batches of this traditional Americanized version of Irish Soda Bread.


What you will need:
3 cup All Purpose Flour
2/3 cup sugar
1 tsp baking powder
1 1/4 tsp salt
1 tsp baking soda
1/4 tsp cinnamon
1 1/2 cup raisins
 1 3/4 cup buttermilk
2 eggs (beaten)
1 tsp vanilla
4 tbsp butter (2 tbsp melted, 2 for greasing the pan)


Preheat the oven to 350 and grease a cast iron dutch oven (or other deep baking dish) generously with butter.  Add dry ingredients in a large bowl.  Whisk them until combined.  Add raisins to this mix and stir gently.  In a separate bowl combine the buttermilk, melted and cooled butter, vanilla and eggs.  Stir to combine and then slowly add the wet mixture to the dry while stirring.  Try no to over mix.  When the dough is ready, pour into prepared dish and bake for 1 hr or until a knife comes out clean from the center.


I usually try to carve an 'x' on the top of the bread so the fairies can get out, but as far as baking purposes go, this bread does not require that like the traditional bread did.

It is best served warm or toasted with butter, however if you find yourself with a craving for french toast... this is (besides carrot cake french toast) the best french toast you can find.

Saturday, March 5, 2011

Brioche


Brioche = heaven... plain and simple. It is light in texture, yet elegantly rich in flavor.  A chunk of this makes the perfect breakfast (or an 11pm snack like im having right now...)


The overall time for making brioche takes about 16 -18 hours. The actual work time of the dough and baking takes a little over an hour.  Which means most of the time it is sitting somewhere in a bowl.


You will need:
3 3/4c bread flour
1/4c sugar
3 tsp of fresh yeast or 2 tsp of dry yeast
2 tsp salt
6 large eggs
1 cup unsalted butter
egg wash for baking

-The first thing to do is to get out your eggs and butter acclimated to room temp.  Cut the butter into small cubes and set aside.

-Next mix the dry ingredients, then add the eggs and combine. when everything forms a dough turn it out onto a non floured surface.

-It is going to be very sticky but that is ok. There is a special kneading technique that allows the dough to develop gluten and air.  like this... http://www.youtube.com/watch?v=PvdtUR-XTG0&feature=related
(the starting dough and end result of the dough wont be that firm. its going to be wet)

-work the dough like this for about 10 minutes, until it starts to come away from the counter easier. at this time spread the butter over the dough, fold the sides over the top and resume working the dough until it is silky smooth and elastic. (it will get kind of funky for a few seconds as the butter works into it, but stay positive)

-lightly dust the work surface and form the dough into a ball. do this by pulling the sides up and on top of the dough, pressing each into the center. put the ball into a covered bowl and let it rest for 2 hours.

-after 2 hours come back and reshape the ball. just like the last step, pull the sides up onto the top and press them into the center. put the ball back into the covered bowl and let rest for 12-14 hours  in a cool place (50-53F) like a basement.

-after 12-14 hours remove the dough from the cool place and let it come up to room temp (about an hour)

-divide the dough into 2 3/4oz balls (a bit larger than a golf ball)

-put the balls into the bottom of a greased bread tin or you can grease up a muffin tin and put an individual ball in each.

-cover them with a towel and let them rise (in a warm place) for 2 1/2 hours.

(preheat an oven to 400)

-after 2 1/2 hours brush the tops with an egg wash and toss these into the oven. after 10 minutes lower the temp to 250 and cook for another 15-20 minutes until the tops are nice and golden.

-remove them from the pan and cool on a rack.

so worth the effort! enjoy!

Key Lime Melt-aways

I really enjoy ice-box cookies.  There is nothing like having a roll of cookie dough in your refrigerator that you can slice into and bake a few satisfying treats whenever life necessitates it.


What you will need:
2 sticks of butter (room temp)*
1/2 cup powdered sugar
2 cups all purpose flour
1 tsp vanilla
4 key limes

* I use salted but if you use unsalted add 1/4 tsp salt to the recipe


In a medium sized bowl cream the butter and sugar together until combined (about 1-2 minutes).   Add the vanilla extract, zest and juice of the limes.  Beat this until incorporated.  Gently mix in the flour until just combined.  The dough should be fluffy.

At this point I find it irresistible to not have at least a taste of the dough.... but then I find only half the batch actually makes it to cookie form.


Scoop the dough onto a fairly long sheet of waxed paper and use the waxed paper to help you roll the dough into a log shape (I like rectangles).  Cover this log in waxed paper and chill in the refrigerator at least 2 hours before slicing and baking cookies.


Slice the cookies about 1/2-1/4 inch thick and bake for 7-10 minutes in a 350 deg oven. 


The powdered sugar makes these cookies seem like clouds.  They just melt away while you eat them.

Note:  If you are having a difficult time finding key limes, this recipe is equally delicious with lemon zest.  You do not need to add the juice of the lemon.  I find that 2 medium sized lemons does the trick.

Friday, March 4, 2011

Delicious Marinara

 Im beginning to learn that sometimes it isnt necessarily a secret ingredient that makes something taste amazing, the secret is how it is cooked. This marinara recipe is an excellent example and has come to show me how important "execution" is. In the past 2 weeks ive made 4 batches of this sauce and i cant get enough.


 you will need:

1/4 cup olive oil
1/4 cup minced garlic
about 1 tablespoon of fresh chopped parsley
14 or so fresh basil leaves
3 28oz cans of san marzano tomatoes
salt
pepper


get everything all prep'ed up and ready to go.

-the tomatoes need to be separated from the juice (save the juice on the side though)
you can either smash the tomatoes up so there are big chunks, or you can chop them up smaller. whatever you like best.


-in a nice heavy bottomed pot start to saute the garlic in the olive oil. med low heat. this is where the magic happens. the key is to get the garlic nicely toasted, but not too toasted because once it burns it becomes bitter.


-once the garlic has toasted add the herbs, salt/pepper, and toss them around in the oil for a half a minute or so.


-after about 30 seconds add the tomatoes and turn up the heat to high. once they start to boil reduce the heat and simmer for 10 minutes.


-now add the reserved juice, bump the heat to high and boil for 15 minutes. this is going to reduce and thicken.


-after 15 minutes of boiling take it off the heat and leave uncovered to cool to room temp. for whatever reason when hot tomatoes are covered while cooling they develop a metalic taste so remember to leave the lid off.  eat it, love it, possibly bath in it. enjoy!

Tuesday, March 1, 2011

Baguette


Ok so ive been on a baking frenzy this week and nothing has brought me more joy than making these baguettes. there is something special about making homemade bread. i dont have any kids, but i could imagine it feels just like bringing a baby home from the hospital. im really looking forward to making them again.  i dont have a step by step recipe ready but i was so excited i had to post some pictures.


Black Bean & Black Quinoa Burgers

Yes, Eric just posted beautiful, lovely doughnuts and I was tempted to not post tonight because they look so good.  But I took one bite of these burgers and I knew I needed to share; it was too selfish not to.


Also, I am incredibly satisfied that this is in fact the 1st iteration of this recipe for which I happened to determine the ingredients while wandering the grocery.  Not all who wander are lost...


What you need:
1 cup (uncooked) black quinoa *
1 14 oz can of black beans
1/4 medium red onion (minced)
1/2 red bell pepper (diced)
2 tsp chipotle seasoning
1 tsp chipotle sauce (or hot sauce or Worcestershire sauce)
1 tsp ground pepper
1/2 tsp salt
1 clove garlic (minced or paste)
1/4 cup + 2 tbsp bread crumbs
2 eggs (beaten)

* black quinoa actually has quite a different flavor than white quinoa, heartier, earthier, a better burger grain... if you cannot find black, red or white will suffice, but try to find black....


To cook the quinoa: First, cover 1 cup quinoa with cold water and soak for a few minutes to remove the bitterness & then drain the water.  Next, add a scant 2 cups water to the quinoa.  Place this on the stovetop and bring to a simmer.  Allow to simmer for 10-15 minutes until all the liquid has been absorbed.

While the quinoa is cooking, dice the onion and pepper and smash the black beans with a fork.


Combine all the ingredients except for the eggs in a large bowl.  At this point, you want to check the mixture for taste.  Add extra spices if needed.  Then, add the eggs.  Make burger sized patties and place then on an oiled baking sheet ( I used olive oil) to prevent sticking.  Bake at 375 for 15 minutes.  Flip the patties and bake at 400 for another 10 minutes.  Mmmm enjoy!


This recipe yields 8 burgers.   You should have plenty for your whole family yourself, later in the week or to pop in the freezer and keep for a rainy day.  This is even after eating 2 (go ahead, they are super healthy).

Glazed Doughnuts


I have been messing around with doughnuts for about 3 years now and I finally came out with something I am proud of. I'm convinced that those light, airy doughnuts I crave from krispy cream are made by the hands of angels, but I gave them a run for their money... if angles use money of course...

I think the hardest part about doughnuts (or any bread for that matter) is that so many variables come into play. For doughnuts, flour type, yeast, humidity, temp, time, oil type, and oil temp are some that come to mind.

Here's the recipe I used and I'll discuss some things I may change in the future.


2 Packages Yeast 
1/4 Cup Warm water (105-115 degrees) 
1-1/2 Cups Lukewarm milk (scalded 
Then cooled) 
1/2 Cup Sugar 
1 Teaspoon Salt 
2 Eggs 
1/3 Cup Shortening 
5 Cups All-purpose flour 
Vegetable oil 

Creamy Glaze: 
1/3 Cup Butter 
2 Cups Powdered sugar 
1-1/2 Teaspoons Vanilla 
6 Tablespoons Hot water 

Dissolve yeast in warm water in 2 1/2-quart bowl. Add milk, salt, eggs, shortening, sugar and 2 cups flour. Beat on low speed scraping bowl constantly, 30 seconds. Beat on medium speed scraping bowl occasionally, 2 minutes. Stir in remaining flour until smooth. Cover and let rise in warm place, until double, 50-60 minutes. (Dough is ready when indentation remains when touched.) Turn dough onto floured surface; roll around lightly to coat with flour. Gently roll dough 1/2-inch thick with floured rolling pin.


Cut with floured doughnut cutter. 


Cover and let rise until double, 30-40 minutes. 


Heat vegetable oil in deep fryer to 350 degrees. Slide doughnuts into hot oil with wide spatula. Turn doughnuts as they rise to the surface. Fry until golden brown, about 1 minute on each side. Remove carefully from oil (do not prick surface); drain. Dip the doughnuts into creamy glaze set on rack then when slightly cooled spread chocolate glaze on top. Can dip in sprinkles or other toppings after chocolate if desired. 

Creamy Glaze: Heat butter until melted. Remove from heat. Stir in powdered sugar and vanilla until smooth. Stir in water, 1 tablespoon at a time, until desired consistency. 


Some Random Thoughts

-The overall flavor was nice. It wasn't nearly as sweet as to what I'm used to (which kind of scared me because I could see myself using 1 cup of confectioners sugar next time inside the dough).

-The texture was by far the lightest doughnut I have made, but it would like it airy.....er? more airy.


Some things I've learned/thoughts for the future

-I used AP flour which has a protein content of around 10%. this might be slightly on the high side resulting in more gluten which probably is what stiffened up the dough. next time I will use cake flour, or a combination of cake/AP flour. zero to light kneading only.

-oil temp is uber important. you need to be between 350 and 360. a thermometer is the only way to go here. guessing will only result in a burnt, or oily doughnut. (this i learned many times)

-I will definitely use more sugar inside the dough next time, probably 1/4-1/2 cup more. 

few things beat a fresh doughnut. go for it!